

Welcome to WorldPainter, a graphical and interactive map painter / generator. Quickly generate expansive, natural looking landscapes, with full manual control over the terrain, using an easy to use and well performing program.
Check out these great examples of both usage and results of WorldPainter. Note that I didn't create these landscapes, or these videos:
Features:
- Custom biome painting
- Create your own custom brushes
- Add custom objects from bo2 files or schematics to the world
- Customise the location and frequency of underground ores and resources
- Add snow and ice
- Easy to use yet flexible and powerful paint-like tools
- Create oceans, landmasses, plains and mountains
- Change the terrain type, add trees and create caverns
→ To download WorldPainter, go to the official website at https://www.worldpainter.net/
→ For support, please use the official WorldPainter subreddit!
Troubleshooting - FAQ - other documentation - support.
You can check the change log here. The installers were created with  . WorldPainter is free and open source software, released under the GNU Public License (GPL) version 3. The source code is hosted on GitHub.
It should be pretty self-explanatory, and the rest you should be easily able to find out by clicking around. Don't forget to try all your mouse buttons, and try holding them down! Post in this thread to get support from me or other users of WorldPainter.
The Load and Save functions save the map in WorldPainter format. The Export function exports the map to a Minecraft world. By default it is exported right to your Minecraft saves directory. You can then open the world in Minecraft under Singleplayer.
The Import and Merge functions allow you to import the landscape from an existing map, and then merge any changes you make to the landscape back to the existing map. It is not meant for general purpose map editing! WorldPainter is, and always will be, a map generator, not a map editor. Note that this functionality is dangerous! Use it at your own risk. Please see this post for important information about how these functions work, and their limitations.
This tool is not meant to create ready to run single player maps, it's meant to create server levels and adventure maps. The idea is to create the basic landscape, with your mountain ranges, oceans, forests, snow and ice, lakes, hills, etc. using the tool, and then go in and fill in the details with other tools.
Please donate!
WorldPainter takes a lot of time to create and maintain. Even though it is free, please show your appreciation by donating: ![]() or
or  .
.
Linking to WorldPainter
If you want to link to WorldPainter from your own site or another forum, I would be honoured! But please don't link directly to the downloads, or upload the files to file sharing sites or host them yourself! Instead, please link people to the official homepage: https://www.worldpainter.net/
Frequently Asked Questions
If you have a question which is not answered on the official Frequently Asked Questions page, please go to the official WorldPainter support subreddit.


 As you can see the gui has had some serious advancements.
 Yes the simple gui is still there


 What more can I say, Epic huh.


 There is a green beacon in the desert, an orange beacon in the forest and three red beacons near the center. And yes I'm in a plane.


 and I've given up
256x256 Changelog:
Version 2.9.0
-Added in Unique HD items
Version 2.8.3
-Graphical fixes such as the red mushroom bar (No one noticed that???)
-Smoothstone is more seamless as well as grass
-Sand has a softer ripple effect and decreases distortion of textures in distance
-New water texture which completely eliminates distant distortions (Thank TheArcher for kicking my ass into gear to make a different texture)
-Thickened the pine tree texture
-Reskinned the bed to be seamless (Hard to notice due to improper lighting in-game)
-Sandstone is more flush with sand color now
-Ice should tile less obviously, but still needs work
-Wool colors more uniform with original MC
Version 2.7.0
-Changed the plowed dirt to be uniform with my dirt
-Updated the damn thing to 1.3 with HD bed and something to do with redstones
-Changed the sandstone to be a more uniform block. (Took top off)
-New bamboo texture
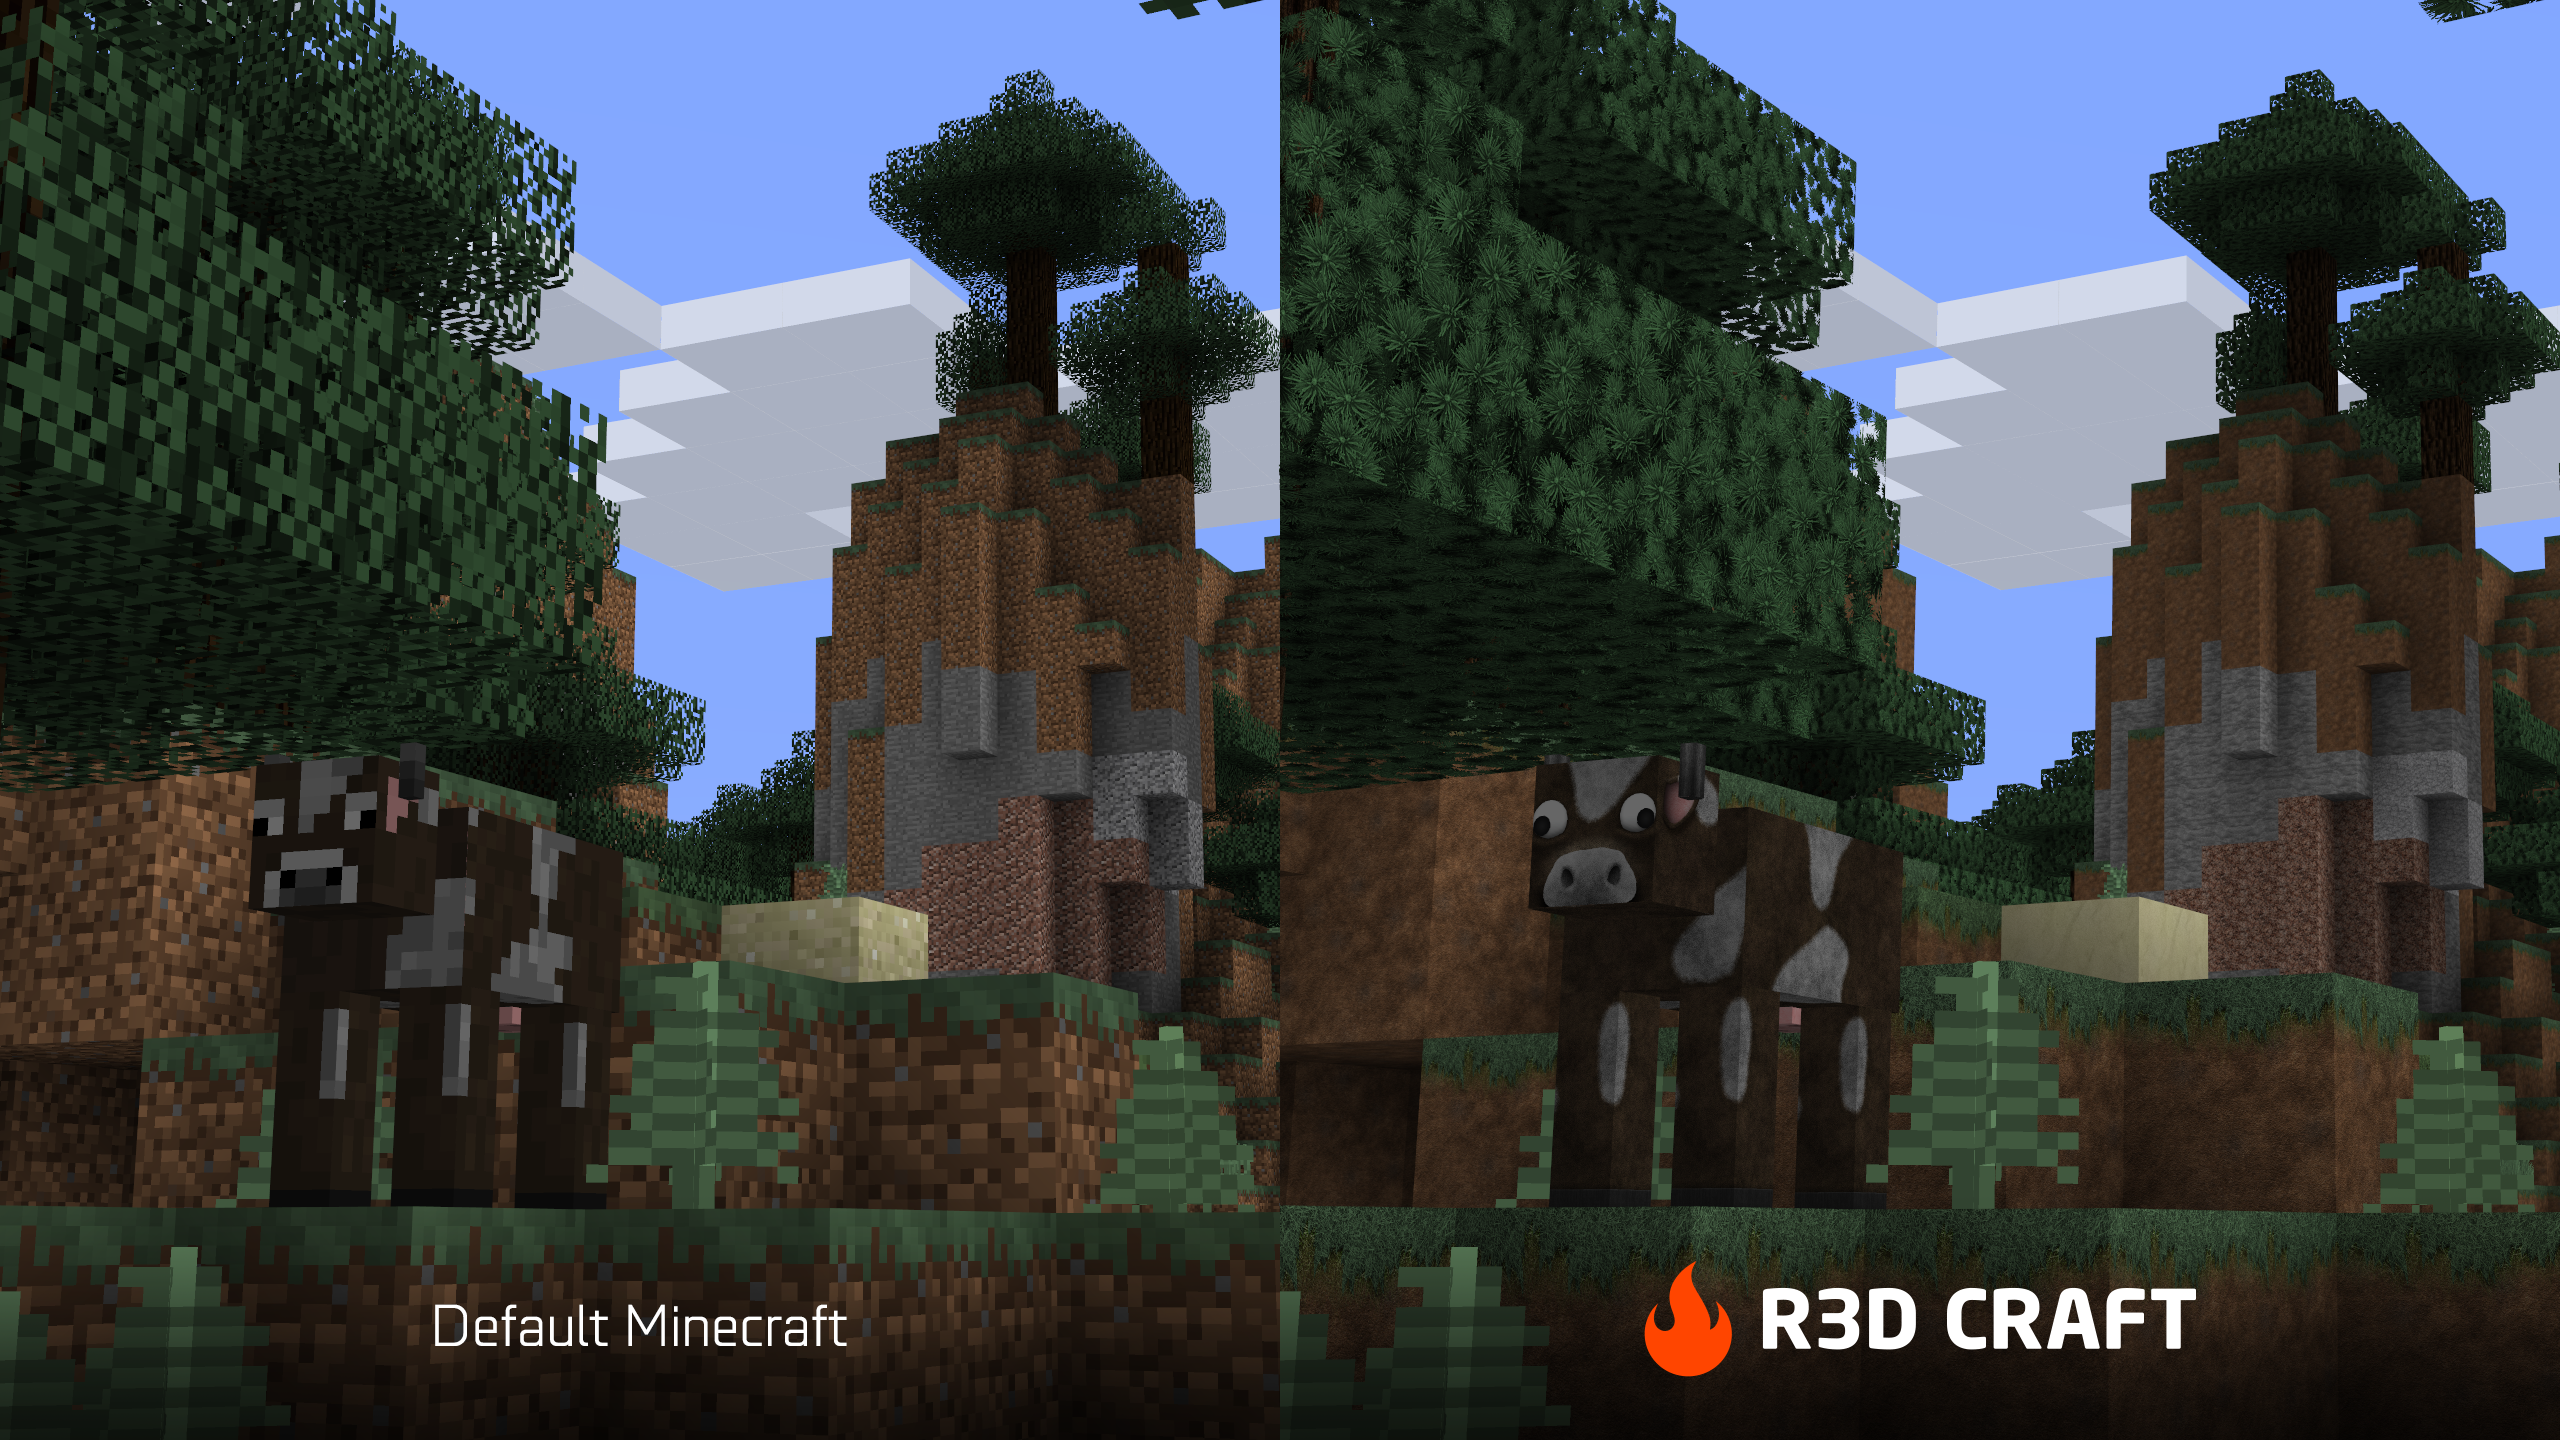
-Added in Misa's mobs because the pigs are less... creepy
-Revamped the glass to be less cluttered
-Added depth and enhancements to the minerals in preparation for GLSL optimization
Version 2.3.5
-Added Nickhimself's wooden door
-Updated GUI with lower res Aaegeon's. Boosts fps minimally
-Fixed the wool bugs. (I think)
-Tweaked Cactus and obsidian
-Small graphical fixes such as missing pixels in chest/furnace
-Made nickhimself's wood seamless and added it in
Version 2.2.8
-Placed some high res wool. (You swine) XD
Version 2.2.7
-Added in mipmapping mod compatibility
-Added in the items from the 128x128 pack with enhancements
-Unique wool is now available. Go punch some sheep. >:D
-New ice texture. I haven't fully tested this, so it might be a major letdown.
Version 2.0
-Massive overhaul of biomes and foliage
-Fixed a few graphical things that looked unsightly such as clay
-The new wildgrass is compatible using the old fashion method (Direct installation)
-Fixed improper tundra biome
Version 1.4.6
-Added Sandstone
-Tweaked the minerals
-Wood just seems broken.
and I've given up
256x256 Changelog:
Version 2.9.0
-Added in Unique HD items
Version 2.8.3
-Graphical fixes such as the red mushroom bar (No one noticed that???)
-Smoothstone is more seamless as well as grass
-Sand has a softer ripple effect and decreases distortion of textures in distance
-New water texture which completely eliminates distant distortions (Thank TheArcher for kicking my ass into gear to make a different texture)
-Thickened the pine tree texture
-Reskinned the bed to be seamless (Hard to notice due to improper lighting in-game)
-Sandstone is more flush with sand color now
-Ice should tile less obviously, but still needs work
-Wool colors more uniform with original MC
Version 2.7.0
-Changed the plowed dirt to be uniform with my dirt
-Updated the damn thing to 1.3 with HD bed and something to do with redstones
-Changed the sandstone to be a more uniform block. (Took top off)
-New bamboo texture
-Added in Misa's mobs because the pigs are less... creepy
-Revamped the glass to be less cluttered
-Added depth and enhancements to the minerals in preparation for GLSL optimization
Version 2.3.5
-Added Nickhimself's wooden door
-Updated GUI with lower res Aaegeon's. Boosts fps minimally
-Fixed the wool bugs. (I think)
-Tweaked Cactus and obsidian
-Small graphical fixes such as missing pixels in chest/furnace
-Made nickhimself's wood seamless and added it in
Version 2.2.8
-Placed some high res wool. (You swine) XD
Version 2.2.7
-Added in mipmapping mod compatibility
-Added in the items from the 128x128 pack with enhancements
-Unique wool is now available. Go punch some sheep. >:D
-New ice texture. I haven't fully tested this, so it might be a major letdown.
Version 2.0
-Massive overhaul of biomes and foliage
-Fixed a few graphical things that looked unsightly such as clay
-The new wildgrass is compatible using the old fashion method (Direct installation)
-Fixed improper tundra biome
Version 1.4.6
-Added Sandstone
-Tweaked the minerals
-Wood just seems broken.  -Added a new water texture. It's not 100% and needs critique
Version 1.3.1
-After hearing opinions on the beta I began work
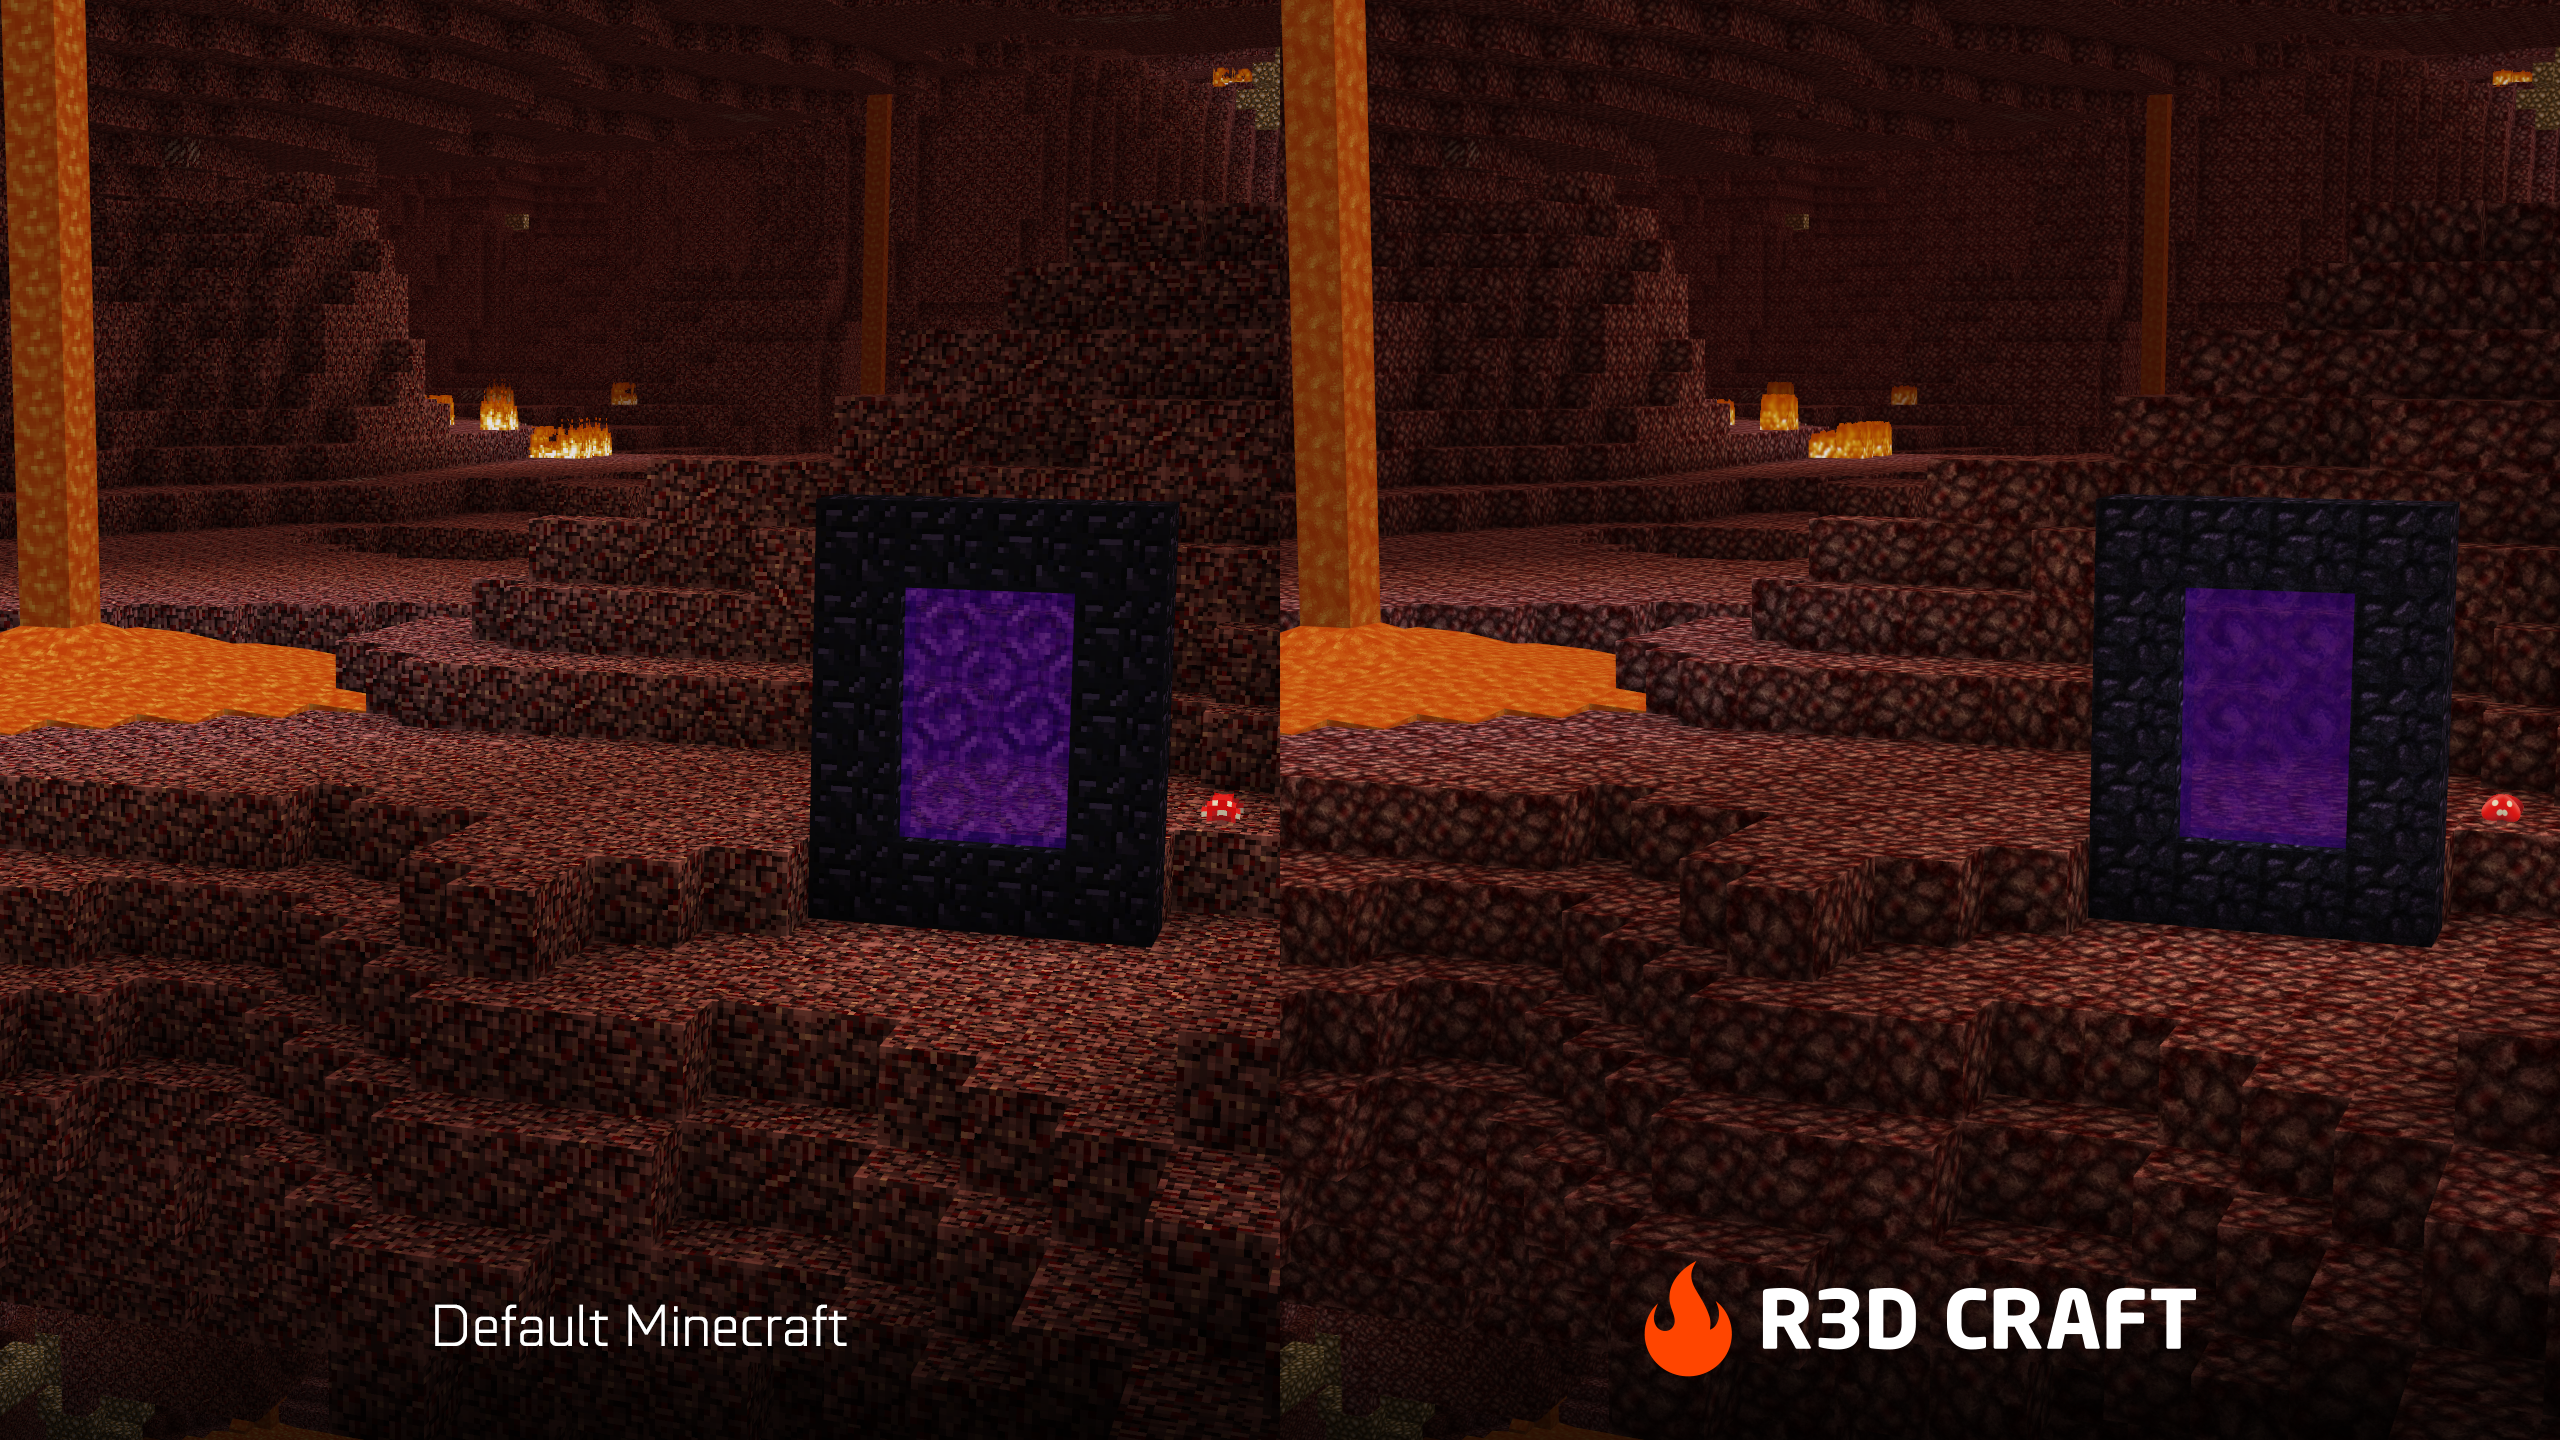
-Added hell world stones
-Better gravel
-Enhanced the wood and fixed coal, which tiled horribly
-Minor tweaks on textures such as obsidian and wood
-Revamped many blocks to tile better such as the dirt
-Added a new water texture. It's not 100% and needs critique
Version 1.3.1
-After hearing opinions on the beta I began work
-Added hell world stones
-Better gravel
-Enhanced the wood and fixed coal, which tiled horribly
-Minor tweaks on textures such as obsidian and wood
-Revamped many blocks to tile better such as the dirt


 btw, i deleted my texture packs from my texture pack folder and that stuff. so it says nullpoint or something like that.


1
4
2,A graphics editing program that can handle transparency. (Gimp or Photoshop)
3,A program to open .jar and .zip files. (7-zip or winrar)
4, A .minecraft folder wiith NO mods (except optifine)
Getting started Skip these steps if you will be using a texture pack other than default
1, First we need to make a folder with the name of your texture pack
2, Second open up minecraft.jar
3, Extract all folders and files to the folder you created in step 1
4, Delete all class files (There should be about 1029 of them)
5, Now inside your folder it should look like this...
1,Create a new folder called anim
2,Open the mob folder then the mob you want to animate with the photo editor of your choice
3,select the whole pic
4,In the anim folder create a new picture with the dimensions 64x3000 (If it is HD do 128x3000 or 256x3000) and fill it with transparency
5,If using gimp select image> configure grid there set the grid to 64x32 , 128x64 and so on BE SURE TO UNCHECK THIS...
6,Then view >show grid
7,In each box put 1 frame (create 2 of the same frames in a row to extend the time the frame shows)
8,When each frame is done do Ctrl+m and merge the layers
9,Then image>fit canvas to layers
10,Then save the file as {any name}.png in the anim folder
11, Then open notepad and type...
[/size]
[size=large]from=/anim/{your file name}.png[/size]
[size=large]to=/mob/[/size][size=large]{the mob file you are animating}.png[/size]
x=[/size]
y=[/size]
w=[/size]
h=[/size]
12,open {your mob}.png if you closed it. get the pencil and zoom in on the mobyou are trying to animate. Move the pencil to the top left of the mob you are trying to animate.In the bottom left you should see coordinates (such as 0,0)
13,Type the x and y coordinates in the proper places
[/size]
[size=large]from=/anim/{your file name}.png[/size]
[size=large]to=/mob/{the mob file you are animating}.png[/size]
[size=large]x=0[/size]
[size=large]y=0[/size]
[size=large]w=[/size]
[size=large]h=[/size]
[size=large]
14, For w and h type the dimensions of the mob you are trying to animate
15,Save as {your file name}.properties
15,Close all open windows and save everything when prompted
16,Compress all files
If this worked for you please show your support and hit that little green up arrow. Thank you
Also if you include animated mobs in your texture pack give me link and put link to this tutorial in the topic and and i will give 1 reputation point for all of your post in this topic and include the banner of the pack here to! (max of 10 reputation points)
Random mobs
http://www.minecraft...al-random-mobs/
Animated paintings
http://www.minecraft...mate-paintings/
Ignore the size 5 in the code it will be fixed soon
1
4
REQUIERMENTS:
1, optifine for 1.2 or later
2, minecraft 1.2.3 or later
3, A graphics editing program with transparency (GIMP or Photoshop will work)
4, 5 to 10 minutes of your time
Animated painting tutorials
Create working screens ,TV's, and custum moving graphics!
http://www.minecraft...mate-paintings/
Animated mob tutorials
Create moving mob textures! The possibilities are endless
http://www.minecraft...o-animate-mobs/
Random mobs
Create multiple textures for the same mob that will be randomly chosen when enabled!
http://www.minecraft...al-random-mobs/
Animated gui's,Terrain,Items and more
Coming soon
In some of these tutorials there will be spacial offers (Easy reputation and texture pack advertising opportunities!! Just to name a few)
If these tutorials worked for you and you would like more tutorials hit that little green up arrow and show your support. Thank you
3
what you will need:
1,Optifine for 1.2 or later
2,A graphics editing program that can handle transparency. (Gimp or Photoshop)
3,A program to open .jar and .zip files. (7-zip or winrar)
4, A .minecraft folder wiith NO mods (except optifine)
Getting started
Skip these steps if you will be using a texture pack other than default
1, First we need to make a folder with the name of your texture pack
2, Second open up minecraft.jar
3, Extract all folders and files to the folder you created in step 1
4, Delete all class files (There should be about 1029 of them)
5, Now inside your folder it should look like this...
Animating your painting
1,Create a new folder called anim
2,Open the art folder than kz.png with the photo editor of your choice
3,On the painting you want to animate put a red X (To show that texture will not be used)
4,In the anim folder create a new picture with the dimensions 16x3000 (If it is HD do 32x3000 or 64x3000) and fill it with transparency
5,If using gimp select image> configure grid there set the grid to 16x16 , 32x32 and so on
6,Then view >show grid
7,In each box put 1 frame (create 2 of the same frames in a row to extend the time the frame shows)
8,When each frame is done do Ctrl+m and merge the layers
9,Then image>fit canvas to layers
10,Then save the file as {any name}.png in the anim folder
11, Then open notepad and type...
from=/anim/{your file name}.png
to=/art/kz.png
x=
y=
w=
h=
12,open kz.png if you closed it. get the pencil and zoom in on the painting you are trying to animate. Move the pencil to the top left painting you are trying to animate.In the bottom left you should see coordinates (such as 64,0)
13,Type the x and why coordinates in the proper places
from=/anim/{your file name}.png
to=/art/kz.png
x=64
y=0
w=
h=
14, For w and h type the dimensions of the painting you are trying to animate15,Save as {your file name}.properties
15,Close all open windows and save everything when prompted
16,Compress all files
Last step:place in texture packs folder
Please comment and if you found any bugs or anything that should be changed please tell me
If this worked for you please show your support and hit that little green up arrow. Thank you
Also if you include animated paintings in your texture pack give me link and put link to this tutorial in the topic and and i will give 1 reputation point for all of your post in this topic and include the banner of the pack here to! (max of 10 reputation points)
Other tutorials
Random mobs
http://www.minecraft...al-random-mobs/
Animated mobs
6
what you will need:
1,Optifine for 1.2 or later
2,A graphics editing program that can handle transparency. (Gimp or Photoshop)
3,A program to open .jar and .zip files. (7-zip or winrar)
4, A .minecraft folder wiith NO mods (except optifine)
Getting started
Skip these steps if you will be using a texture pack other than default
1, First we need to make a folder with the name of your texture pack
2, Second open up minecraft.jar
3, Extract all folders and files to the folder you created in step 1
4, Delete all class files (There should be about 1029 of them)
5, Now inside your folder it should look like this...
Creating your random mobs
1,Create your random mob textures
2,save in the mob folder as {mob name}2.png
3,If you wish to create more than 2 textures for 1 mob save your file(s) as {mob name}3.png And so on the next file being called {mob name}4.png
Example of texture pack with random mob support (This texture pack being john smith)...
4,Close all open windows and save everything when prompted
5,Compress all files
Last step:place in texture packs folder
Please comment and if you found any bugs or anything that should be changed please tell me
If this worked for you please show your support and hit that little green up arrow. Thank you
Other tutorials
animated paintings
http://www.minecraftforum.net/topic/1286148-tutorial-how-to-animate-paintings/
1
open minecraft you will have to enter all your info (username and password) this should download a new .minecraft
Close the game
install optifine
transfer your screenshots and your worlds
1