Maybe... I don't know. I AM on their team, but I sort of took this on because my friend is a Mech Fan. I don't know, maybe collaborators? I give them code, I get their code? I'm not sure, but we'll see.
Re-download MCP 1.8.1
Extract it.
Go to %appdata%
Copy bin and resources folder to jars folder
Decompile (Any errors here are because there is a problem with MCP or your minecraft.jar is modified.)
Do coding
Recompile (Any errors here are as a result of a decompile error or errors in code)
Run client (Any errors here are because of recompile errors)
Reobfuscate (Errors here are not often found but usually due to recompile error, if there are files in your reobf folder then it's all worked.)
Thank you SOOOOO MUUUUCCCCHHHHHH!!!! IT ACTUALLY WORKED! THANKYOUTHANKYOUTHANKYOUTHANKYOUTHANKYOU!
Welcome to my mega tutorial thread! Here I will be posting tutorial videos on almost everything you can do with modding! Currently there is not many videos but just wait until I create them all.
BEGINNER: (These are simple tutorials to help you get modding)
1. Setting up MCP with Eclipse
6. Creating Tools and Weapons
7. Creating Armor
9. Creating NPCs
10. Fixing Common Errors
11. How to Export Your Mod
INTERMEDIATE: (These are tutorials for people who are familiar with Java)
12. World Generation
13. Configuration Files
14. Interactive NPCs
15. Creating Explosives
16. Creating New GUIs
17. Creating a New Furnace Like Block
19. Creating a New Liquid
20. Creating a New Crop
ADVANCED: (These tutorials are very hard and not recommended to most people)
Last updated Saturday, September 4, 2010
Changelog:
•Fixed specularity problem with transparent regions on hats (caused weird shadows where they shouldn't be)
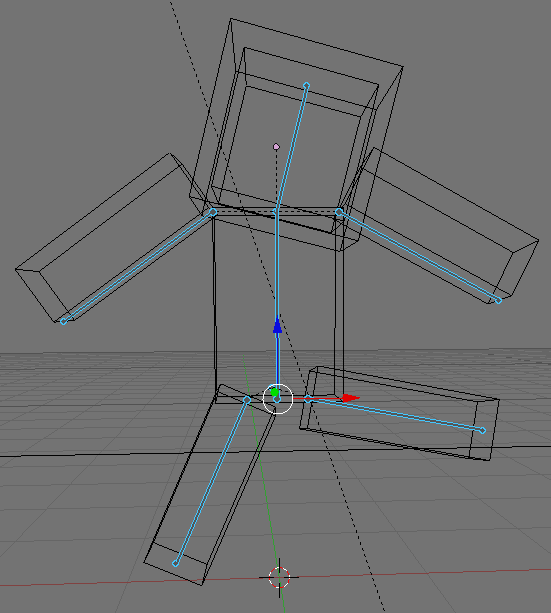
•Added joints (elbows, knees, and body bending)
•Fixed ugly edges when body bends
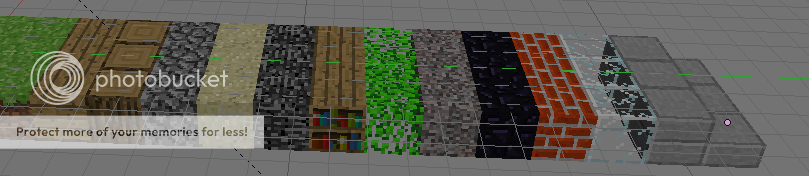
•Added lots of blocks to make scenes with...
•Improved glass and leaf blocks
•Added tree blocks
•Got rid of some annoying constraints
•Added clouds
•Changed lighting
•Added creeper (on layer five, hidden by default)
•Fixed creeper texture
•Added chests, furnaces, crafting blocks, ore, and torches
_________
With this handy tool, you can create fancy renders and animations of your minecraft characters. For example:
Download the blender file here: http://www.box.net/shared/132x3xko3s
You can get Blender here: http://www.blender.org/download/get-blender/
It's free, open source, and not bloatware, so the download is relatively small as far as 3D development suites go.
You don't need much knowledge of blender to use this, and I've set it up so that there should be minimal effort for the user to pose his character and apply skins to it. The body parts are precision modeled and mapped to exactly their dimensions in pixels on the corresponding texture regions. I was very much helped in doing so by Swedman's Skin Helper, so credits go to him for that and also the fact that this blender file comes bundled with his helper image. I find it to be a very concise and simple visual aid, so I hope he has no objection to me re-distributing it.
Now, it also comes with lots of blocks for making scenes; they are located on layer four.
Here's an example of skins look rendered (this one's mine):
In-program:
You can see your texture in the 3d viewport as well as in the render.
The body mesh is attached to an armature, allowing you to pose the character however you wish:
To pose the character, simply grab the bones you wish to manipulate with the right mouse button. This can be done with the camera and lamp(s) as well. To take a pretty picture of your character once you've set him up, just press the huge "render" button in the buttons panel. If you have any problems, google for solutions before consulting me. If you have no knowledge of Blender at all, I suggest looking for some beginner tutorials, but maybe just the ones that cover bones and textures.
For you advanced Blender users out there, this could be used to bake procedurally calculated maps into textures, such as ambient occlusion (pretty shading) or any of the procedural textures blender comes with. Therefore, this can be used to create skins as well as display them.
Here's an ambient occlusion texture I'm giving away for free; you can make a "multiply" layer in your image editor and put this in it to have an overlying geometry-based shading on your skin. <-- there it is. And below is how it looks on a character (by itself):
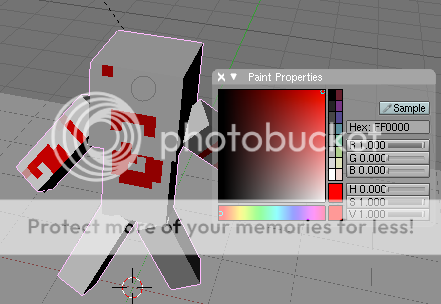
Not only that, but you can use Blender's texture paint mode to paint directly onto the 3d Model.
Enjoy!
PS: If your viewport textures look really blurry (it won't affect the render, so it's not that serious), uncheck the "Mipmapping" button in the user preferences window (Drag the top bar down to view the extra settings, then click on the "System&OpenGL" tab): http://i614.photobucket.com/albums/tt22 ... ipmaps.png
EDIT: Here is the obj file of a UV mapped minecraft character for import into other 3D programs.


 <-- there it is. And below is how it looks on a character (by itself):
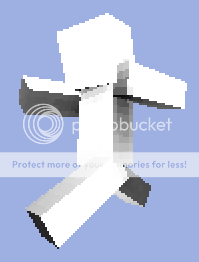
1
1
Thank you SOOOOO MUUUUCCCCHHHHHH!!!! IT ACTUALLY WORKED! THANKYOUTHANKYOUTHANKYOUTHANKYOUTHANKYOU!